Table Of Contents
In the first part of this tutorial
we created a local git repository with SourceTree,
committed a change, and reviewed the commit history. Make sure you have either already completed the
previous part of this tutorial,
or that you already have a repository on SourceTree
you want to link up with Bitbucket.org.
Making a remote version on Bitbucket
While you can create a new remote repository to connect to on Bitbucket.org, here we will do this from within SourceTree.
Open SourceTree and click the “Settings” button.

Click “Add”.
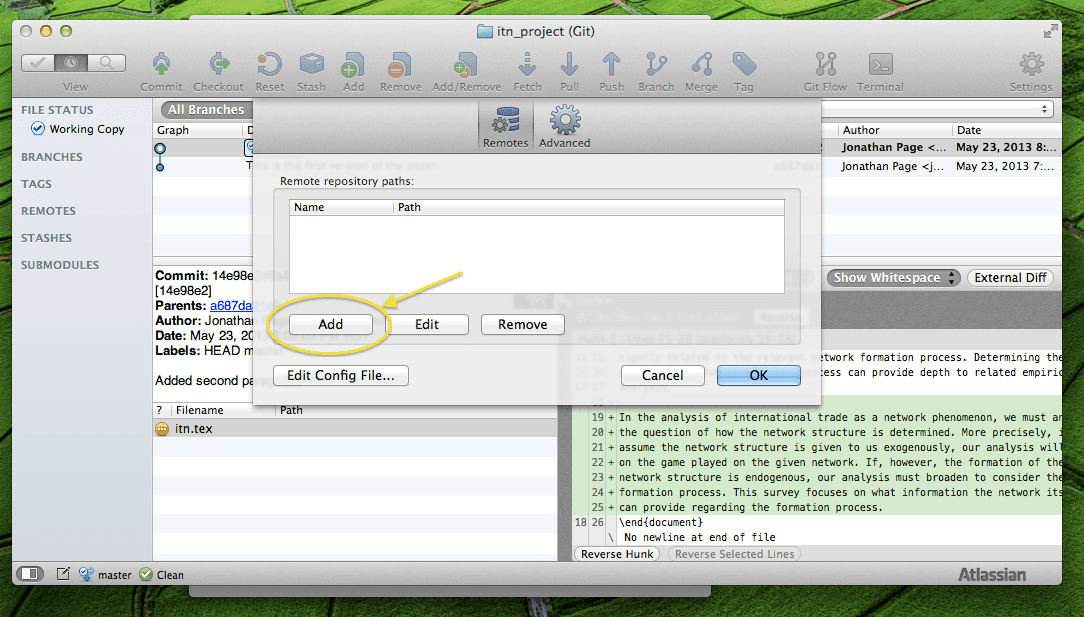
Click the button with a globe icon.

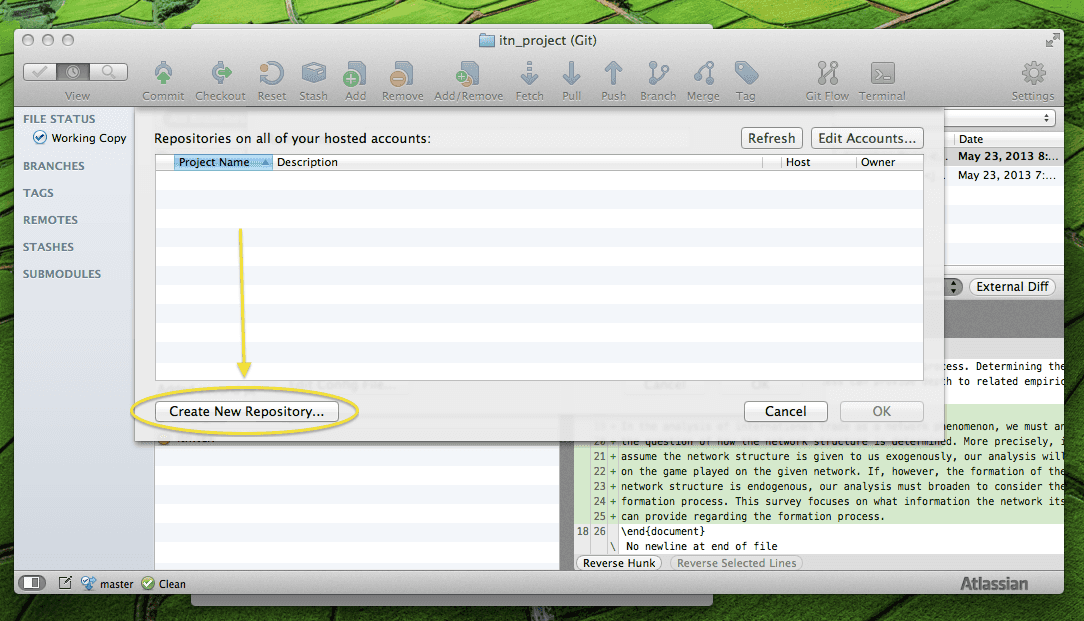
Click the “Create New Repository …” button.
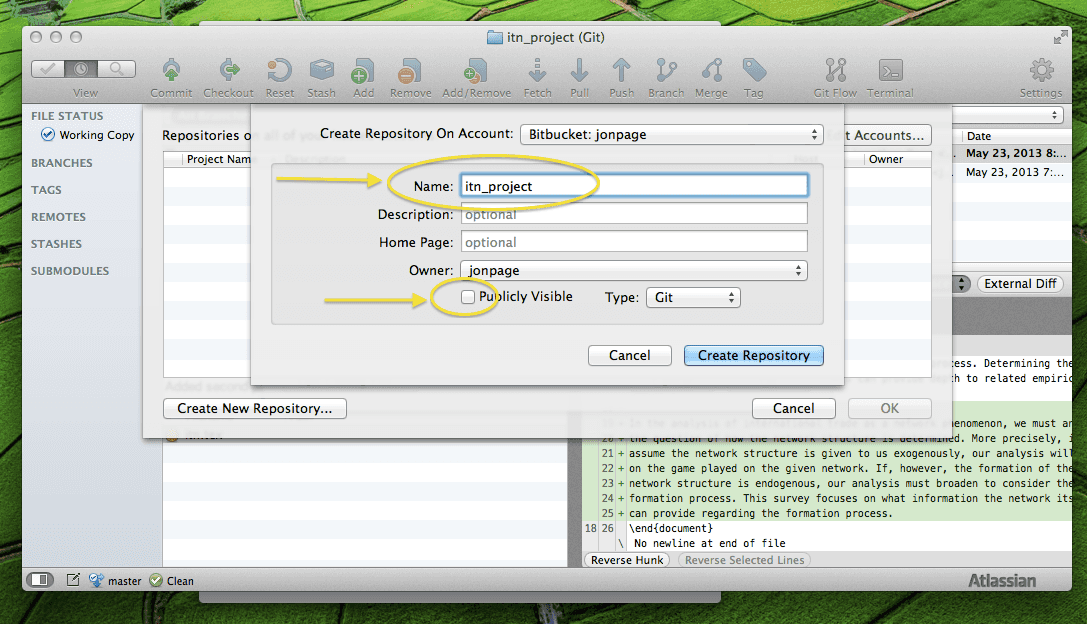
Fill out the new repository dialog. Set “Name” to ”itn_project”, add a description if desired, and
make sure to uncheck the “Publicly Visible” option. Finally, click “Create Repository”.
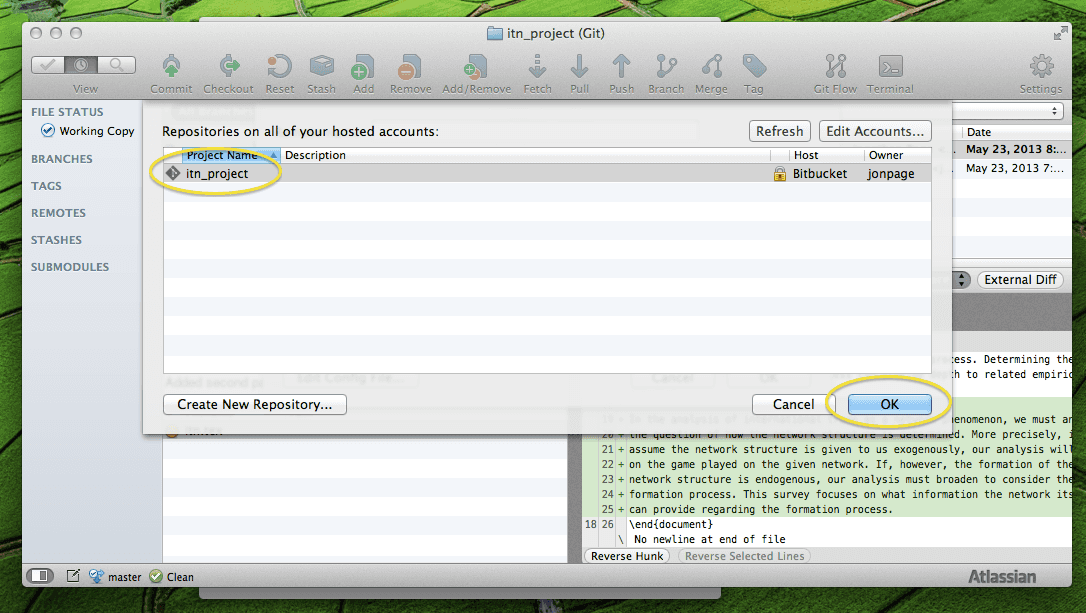
Notice that now you have an entry in your list for “itn_project” that is hosted by Bitbucket. Click “OK”.
Set “Remote Name” to ”itn_remote” and
click “OK”.
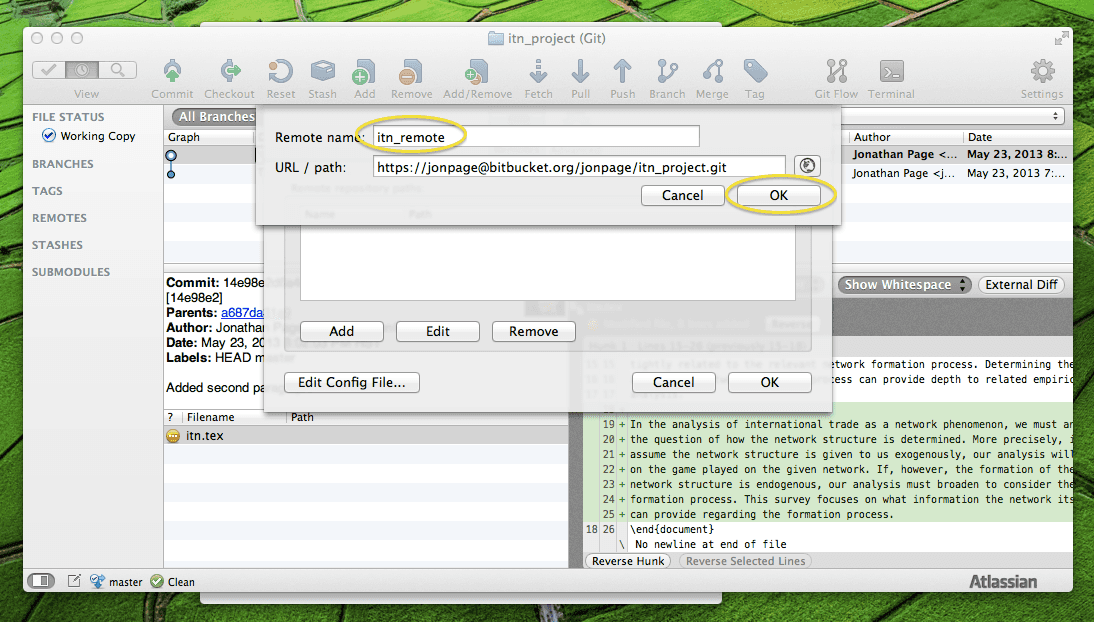
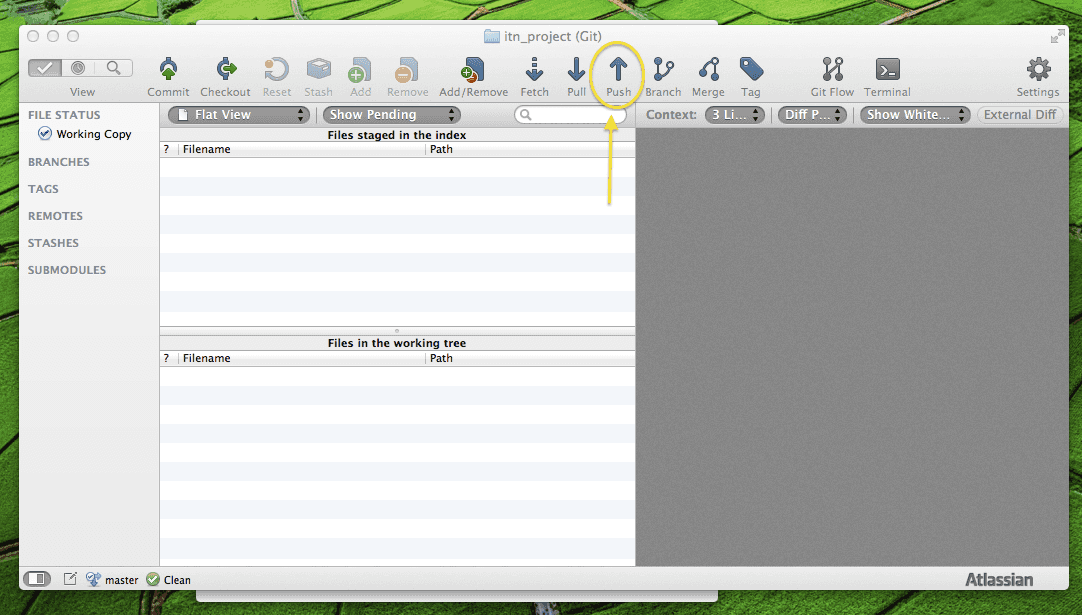
lick “OK” one last time. Finally, click the “Push” button to push the repository you have been working on to the remote one you just created.
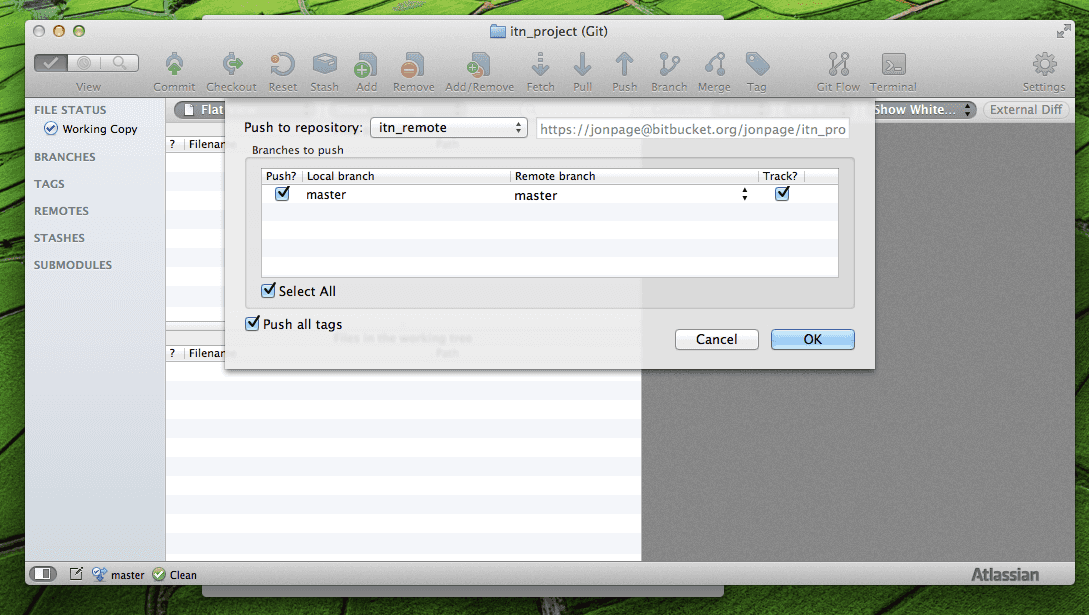
Make sure the “Local Branch” “master” is checked. Then click “OK”. Enter your password if requested to push the repository.
Inviting a collaborator
Go to Bitbucket.org and login. Click on the “Repositories” menu at the top and choose your newly created repository.
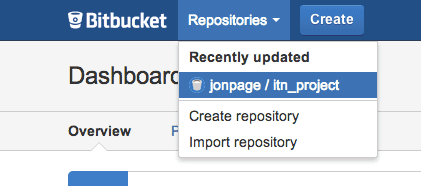
You should now see something like the following screenshot. This shows that your repository has been setup on Bitbucket.org.

Click the “Share” button.

Next, enter the email address (or Bitbucket username if you know it) of the collaborators you want to add to this repository (i.e. your coauthors) and then click the “Add” button. Here, I’m going to add Joseph Page.
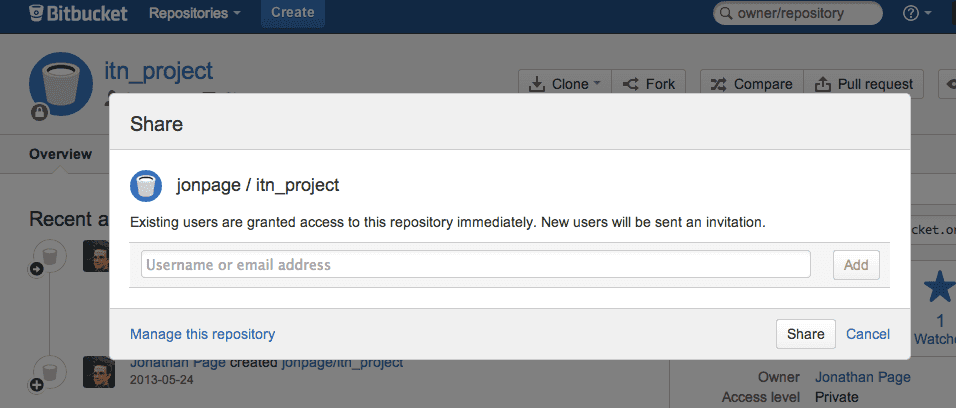
Before clicking “Share”, set the permissions of this new user of your repository. I set Joseph’s permissions to “WRITE” because I want him to be able to push commits to the repository (see the documentation for more details on permissions).
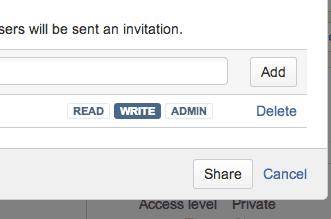
Click “Share” to invite your new collaborator. This will send a link which your collaborator can use to access the repository. Once they login to Bitbucket they will be able to access your repository.
Viewing a collaborator’s commit
Once your collaborator has pushed a commit (i.e. made changes and updated the repository) you will see this on the main page for your repository.
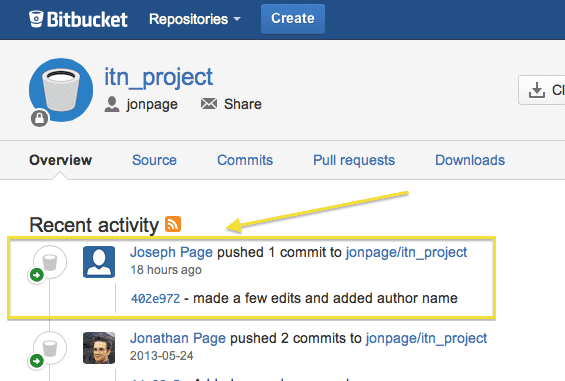
You can see Joseph left the following commit message:
made a few edits and added author name
Click on the link to the commit (see picture below).

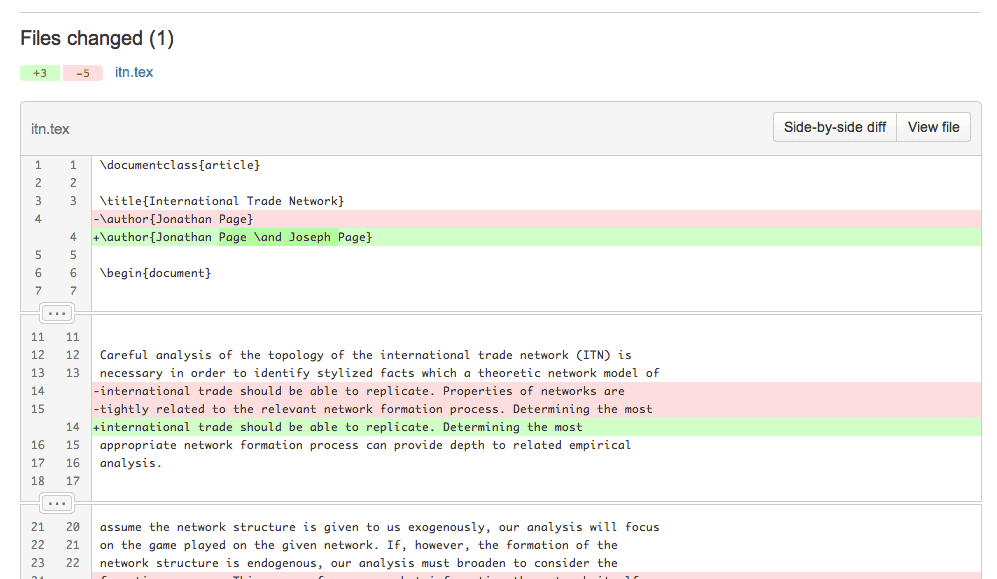
This pulls up the summary of the latest commit. Scroll down to view the changes that were made.
Conclusion
This tutorial (and the previous one)
merely scratched the surface of how leveraging DVCSs, such as git and hg,
can enhance your research productivity. Using SourceTree, integrating these tools is easier than ever.
Have fun with Bitbucket and let me know if you have any questions in the comments below!
Related Posts
Quick Links
Legal Stuff
Social Media
