Table Of Contents
Why use LaTeX?
LaTeX is the standard typesetting for economists. Equations are easier to type, making citations is a breeze, and your finished paper just looks more beautiful.
Goals:
By the end of the tutorial, you should:
- Have LaTeX installed on your Mac
- Install and be able to use a text editor, in this case Sublime Text 2
- Create your very first LaTeX article!
If you are one of the many moving from Sublime Text to Atom, check out our new tutorial for Atom: Creating Your First PDF with LaTeX and Atom
What you need:
- Mac
- At least 3gb of free hard drive space
- A high speed internet connection
Step 1: Installing MacTex
- Visit https://www.tug.org/mactex/ and download the latest MacTex.pkg.
The file is 2gb and will take a while to download. Go grab a coffee.

Download MacTex - When it is finished downloading, double click the downloaded file and install. This should take up between 2-3gbs of space on your computer.
- After you are finished, you should see that lots of program were installed. Just ignore them for now.

Extra Programs
Step 2: Installing Sublime Text
We need a text editor to write our LaTeX documents in. We could technically use any text editor/coding software, but we like this one a lot. There are lots of great features (e.g., snippets), so even if you have a preferred text editor, give this one a shot. Sublime Text 2 is free to evaluate with no enforced time limit for the evaluation, although they do occasionally ask you if you would like to purchase. You don’t have to purchase, but if you find it useful, you should.
- Go to https://www.sublimetext.com/2 and download the latest version.

- When it’s done downloading, install it like any other program. (This means drag it into the applications folder).
Step 3: Installing Package Control
We need package control so that Sublime can do fancy things with our LaTeX documents.
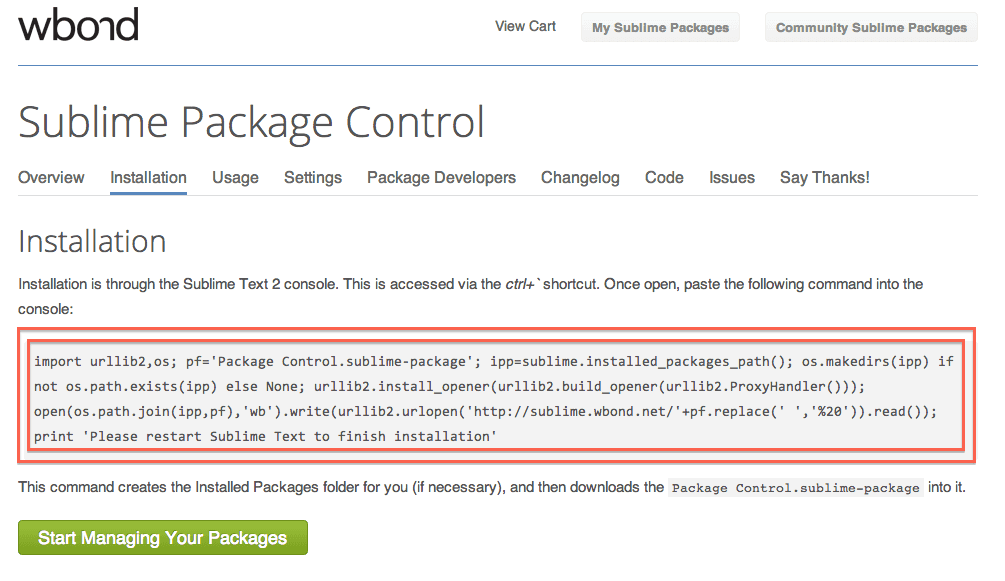
- Go to the package control website, https://wbond.net/sublime_packages/package_control/installation
-
 Highlight the code in the gray square and copy it.
 - Open Sublime Text 2
- Access the Console by pressing ”
Control+`” (That’s the key right under the escape key). A white window should pop up. - Paste the text you copied earlier into the bottom of the console.
- Press “Enter” and let Sublime Text 2 work its magic. Then close and restart Sublime Text 2.
Step 4: Installing LaTeX Tools
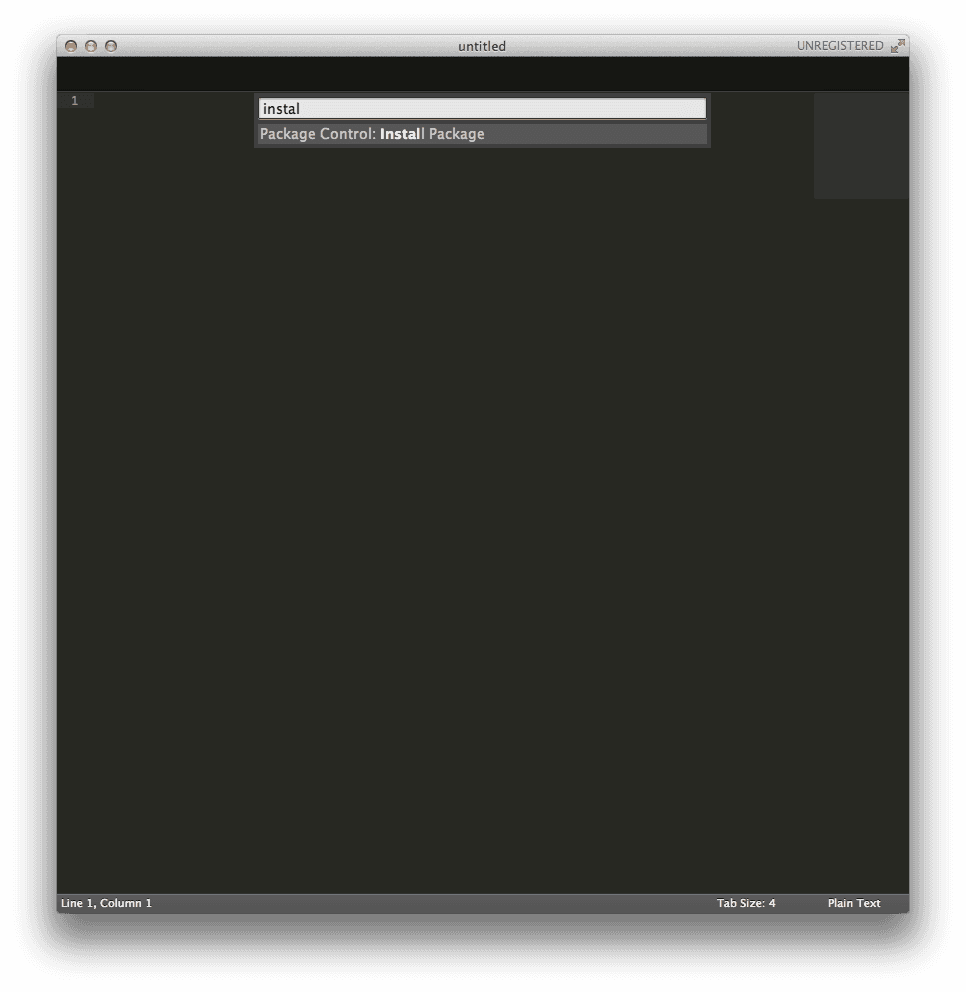
- Now that Sublime Text 2 is restarted, press ”
Command+Shift+P” to open the command pallet. Alternatively you can find it in theToolsmenu - Start typing ”
Install Package” and you’ll find it auto-completes if for you. Select and hit ”Enter“. -
 After it is finished installing repositories, you should see another text box.
Start typing ”
After it is finished installing repositories, you should see another text box.
Start typing ”LaTeX Tools” to find it (don’t worry about capitalization), and install the package. - Quit and restart Sublime Text 2
Step 5: Installing Inverse Search
We want inverse search so that when Sublime Text 2 loads the PDF viewer, clicking on text in the PDF viewer brings us back to our LaTeX code. This is very helpful in proofreading changes you have been making to your document.
Download and install SKIM PDF viewer.
Open Skim, go to
Preferences > SyncUncheck “Check for file changes” option
Under Preset type ”
Custom”Set the Command to:
/Applications/Sublime Text 2.app/Contents/SharedSupport/bin/sublFinally set Arguments to:
"%file":%line Close and done!
Step 6: Your First PDF
Now that you have installed Sublime Text 2 (ST2) and LaTeXTools, open a new file in ST2 (using the menu or Command+N).
Copy and paste the following LaTeX source into your new file:
\documentclass{article}\title{Title}\author{Your Name}\begin{document}\maketitle{}\section{Introduction}This is where you will write your content.\end{document}
Save the file (using the menu File>Save or Command+S) as first.tex. After saving, build the PDF
(using the menu Tools>Build or Command+B). You should see the PDF previewer display your first PDF.
Congratulations!
Step 7: All Done!
Congratulations! You are all done installing Sublime Text 2 to work with LaTeX and on your way to creating your first document. Next, you’ll want to learn how to use and create snippets to make your life even easier.
Share
20 Comments
Related Posts
Quick Links
Legal Stuff
Social Media
